Quantcast
Channel: Ketan Parmar (KP Bird)
Viewing all 75 articles
Browse latest View live

Android Add menu in Share

$
0
0


Many times you might observe 3rd party application icon in Android Share menu. Suppose your application pick image/video from gallery, pick contact from contact book or pick audio from music player In this situation better options is to add your application menu in Share options so that user can directly select image/video from gallery or relavent application.

Share menu will display name & icon of your application

It is very easy to add menu in Share option.

Step 1 : Create Android project

Step 2 : Create activity named "MyShareMenu.java" (No need to create xml layout for this Activity)

Step 3: Register new activity in AndroidManiFest.xml file like following


<activity android:name="MyShareMenu">
<intent-filter>
<action android:name="android.intent.action.SEND"></action>
<data android:mimetype="*/*"></data>
<category android:name="android.intent.category.DEFAULT"></category>
</intent-filter>
</activity>
The importent part is data tag in that you can specify mimeType as per your application supports. For the demo purpose I have choose */* means every mimeType but you can write image/*, audio/* , video/* as per the need of your application.

Step 4: Fetch Uri of selected item, When user click on application from the Share menu, Android will call "MyShareMenu" activity with uri of selected item. Use following code to get Uri.

protected void onCreate(Bundle savedInstanceState) {
super.onCreate(savedInstanceState);

Intent intent = getIntent();
Bundle extras = intent.getExtras();
String action = intent.getAction();

// if this is from the share menu
if (Intent.ACTION_SEND.equals(action)) {
if (extras.containsKey(Intent.EXTRA_STREAM)) {
// Get resource path
Uri uri = (Uri) extras.getParcelable(Intent.EXTRA_STREAM);
Toast.makeText(this, "Selected File :" + uri.toString(), Toast.LENGTH_LONG).show();
}
}
}

In above code I have displays Toast but your can write business logic as per your need.


Android API Difference between 3.0 and 4.0 OS - Ice Cream Sandwich

$
0
0

API Difference between Honeycomb and Ice Cream Sandwich

The overall difference between API Levels 13 and 14 is approximately 3.95%. The table below lists the numbers of program elements (packages, classes, constructors, methods, and fields) that were added, changed, or removed. The table includes only the highest-level program elements — that is, if a class with two methods was added, the number of methods added does not include those two methods, but the number of classes added does include that class.

TypeAdditionsChangesRemovalsTotal
Packages548053
Classes and Interfaces901920282
Constructors192021
Methods2659429408
Fields4053416455
Total804370451219

Here I found the list of removed classes, methods and interfaces in Android SDK 4.0.


  • ALBUM_ART 
  • freeze ()
  • FX_SURFACE_BLUR 
  • FX_SURFACE_DIM 
  • FX_SURFACE_MASK 
  • FX_SURFACE_NORMAL 
  • GPU 
  • HARDWARE 
  • HIDDEN 
  • hide ()
  • NON_PREMULTIPLIED 
  • obtain (long, long, int, int, int[], PointerCoords[], int, float, float, int, int, int, int)
  • PUSH_BUFFERS 
  • readData
    • type  (float[]) in android.renderscript.AllocationAdapter 
    • type  (int[]) in android.renderscript.AllocationAdapter 
  • SECURE 
  • setAlpha (float)
  • setDataSource (String)
  • setFlags (int, int)
  • setFreezeTint (int)
  • setLayer (int)
  • setMatrix (float, float, float, float)
  • setOrientation (int, int)
  • setPosition (int, int)
  • setSize (int, int)
  • setSummaryOff
    • type  (int) in android.preference.CheckBoxPreference 
    • type  (CharSequence) in android.preference.CheckBoxPreference 
  • setSummaryOn
    • type  (int) in android.preference.CheckBoxPreference 
    • type  (CharSequence) in android.preference.CheckBoxPreference 
  • setTransparentRegionHint (Region)
  • show ()
  • subData (int, FieldPacker)
  • subData1D
    • type  (int, int, byte[]) in android.renderscript.AllocationAdapter 
    • type  (int, int, float[]) in android.renderscript.AllocationAdapter 
    • type  (int, int, int[]) in android.renderscript.AllocationAdapter 
    • type  (int, int, short[]) in android.renderscript.AllocationAdapter 
  • subData2D
    • type  (int, int, int, int, float[]) in android.renderscript.AllocationAdapter 
    • type  (int, int, int, int, int[]) in android.renderscript.AllocationAdapter 
  • subElementData (int, int, FieldPacker)
  • SURACE_FROZEN 
  • SURFACE_BLUR_FREEZE 
  • SURFACE_DITHER 
  • SURFACE_FROZEN 
  • SURFACE_HIDDEN 
  • unfreeze ()

How to write Android Style and Themes ?

$
0
0

We all know that Android has Style and Theme feature, We know that it work like CSS in context of HTML/Web. but I feel it is the most unexplored feature of Android. Since last few days I am working on it and I have create two theme named ThemeBlue and ThemeGreen. (Check attached screenshot)

I figure out following pros and cons. 

Pros

1. We can avoid Image (PNG,Bitmap,etc..) I also reduce size of APK 
2. We don't require images for Multiple screen resolution.
3. Less Memory allocation compare to Images


Cons

1. Only four shapes supported (rectangle, ring, ovel, line). we can not create complex shapes using it.
2. Gradient isn't supports by Stroke.
3. layer-list has limited feature, layer-list isn't support to arrange layer in specific/relative position.
4. Shape does not support path.


Steps to create Themes 

Step 1 : Open your eclipse and create new Android Project
Step 2 : Right click on project name select New->Android XML File
Step 3 : Create themes.xml file in values folder
Step 4 : Create styles.xml file in values folder
Step 5 : Create colors.xml file in values folder
Step 6 : Set your theme in AndroidManifest.xml - It will apply theme in all Activities, you can set theme for single activity using "setTheme()" function.

Here is the file content

themes.xml


styles.xml


colors.xml


#ffffff
#000000
#2f6699
#449def
#53933f
#70c656


Download Code : Click Here
Click on File -> Download Original File


Android Ant Build - Android Automated Build

$
0
0

I am trying to write very simple tutorial to build Android APK using Ant tool.  To build APK using eclipse is very easy, normally developer use it but in some specially senario you need to build APK using command line. 

Setup Environment 

1. JDK :Install JDK and set JAVA_HOME 
2. Android SDK :Download Android Platforms using Android SDK
3. Ant :Install Ant and set ANT_HOME 


Now, Take your any project developed in eclipse or any other IDE. I am taking project from eclipse.

Step 1 : Copy your project folder from Eclipse Workspace to the Desktop
Step 2 : Create keystore file using keytool command
keytool -genkey -v -keystore .keystore -alias  -keyalg RSA -keysize 2048 -validity 365
Step 3 : Copy keystore file in your project folder
Step 4 : Create "ant.properties" file using any text editor, this file contain information about keystore file. create your keystore file `
key.store=MyAndroidApp.keystore
key.alias=MAA
key.store.password=kpbird
key.alias.password=kpbird
Step 4 : Create "default.properties" file, If you have created project using eclipse, this file will available, If not create file with following content, change api level as per your project.
# This file is automatically generated by Android Tools.
# Do not modify this file -- YOUR CHANGES WILL BE ERASED!
#
# This file must *NOT* be checked in Version Control Systems,
# as it contains information specific to your local configuration.


# location of the SDK. This is only used by Ant
# For customization when using a Version Control System, please read the
# header note.
sdk.dir=/Users/kpbird/android-sdk-macosx

Step 6 : Create "build.xml" with following content, change project name "MyAndroidProject".


Step 7 : Now, It's time to start build, open terminal, go to the project folder and execute following command
ant release
Step 8 : You APK file will be at following path.
Project Folder -> bin -> MyAndroidProject-release.apk

Summary

Create following files in your Project Folder and execute "ant release" command
  1. keystore
  2. ant.properties
  3. default.properties
  4. local.properties
  5. build.xml
For more information you can refer following link
http://developer.android.com/guide/developing/projects/projects-cmdline.html

Use cron job or Hudson for automated build, run "ant release" command from con job or Hudson

API Difference between Ice Cream Sandwich And Jelly Bean

$
0
0

API Difference between Ice Cream Sandwich And Jelly Bean

The overall difference between API Levels 15 and 16 is approximately 2.52%. The table below lists the numbers of program elements (packages, classes, constructors, methods, and fields) that were added, changed, or removed. The table includes only the highest-level program elements — that is, if a class with two methods was added, the number of methods added does not include those two methods, but the number of classes added does include that class.

TypeAdditionsChangesRemovalsTotal
Packages439043
Classes and Interfaces552110266
Constructors1222438
Methods37415120545
Fields171464221
Total616469281113


Web Platform

$
0
0

Are you web developer ?
Yes, I am

How many things you required to learn ?
Let me see... HTML, CSS, HTML5, JavaScript, CSS3, Ajax, JSON, XML, cross browser, multi language, jQuery, WebGL, Canvas, IndexedDB, Offline Access, Storage, Security, etc....

What is your biggest pain area ?
Find good document at one place, We have all documents but it's scattered over internet.

Web Platform is trying to solve your biggest pain "Find docs at one place"

http://www1.webplatform.org/
"We are an open community of developers building resources for a better web, regardless of brand, browser or platform. Anyone can contribute and each person who does makes us stronger. Together we can continue to drive innovation on the Web to serve the greater good. It starts here, with you."


This site has been convened by W3C. The other stewards, listed below, support it through content, people, funding, and other contributions. More information on each of the stewards can be found on their pages.


Now Google is focusing on App Quality

$
0
0
It is know to every one that "Majority of Android apps are not up to the standard", It's not always a foulte of developers but many times client asks to make clone (100% clone including navigation to UI component ) of apps from other platform.

App Quality Check list is divided in three major sections

1. Core App Quality
  • Visual Design and User Interaction
  • Functionality
  • Performance and Stability
  • Google Play
  • Setting Up a Test Environment
  • Test Procedures
  • Testing with StrictMode
2. Tablet App Quality
  • Test for Core App Quality
  • Optimize your layouts for larger screens
  • Take advantage of extra screen area available on tablets
  • Use Icons and other assets that are designed for tablet screens
  • Adjust font sizes and touch targets for tablet screens
  • Adjust sizes of home screen widgets for tablet screens
  • Offer the app's full feature set to tablet users
  • Don’t require hardware features that might not be available on tablets
  • Declare support for tablet screen configurations
  • Follow best practices for publishing in Google Play
3. Improving App Quality after Launch
  • Listen to Your Users
  • Improve Stability and Eliminate Bugs
  • Improve UI Responsiveness
  • Improve Usability
  • Professional Appearance and Aesthetics
  • Deliver the Right Set of Features
  • Integrate with the System and Third-Party apps
  • Pay Attention to Details

Source : http://developer.android.com/distribute/googleplay/quality/index.html

In Depth : Android Package Manager and Package Installer

$
0
0
We are installing and uninstalling APK(s) every day, might be many time in a day, but have you try to get answer of following questions ?

1. What is Package Manager and Package Installer ?
2. Where APK files stores in Android ?
3. What is APK installation process in detail ?
4. How Package Manager store data ?
5. Where I can find source code of Package Manager and Package Installer ?


1. What is Package Manager and Package Installer ?

PackageInstaller is the default application for Android to install interactively normal package. PackateInstaller provide user interface to manage applications/package. PackageInstaller calls InstallAppProgress activity to receives an instruction from the user. InstallAppProgress will ask Package Manager Service to install package via indalld. Source code is available at  <Android Source>/packages/apps/PackageInstaller.


Installd  daemon's primary role is to receive request from Package Manager Service via Linux domain socket / dev/ socket/ installed. installd execute series of steps to install APK with root permission
[Ref: https://github.com/android/platform_frameworks_base/blob/master/cmds/installd/commands.c]


Package Manage is API which actually manage application install, uninstall, upgrade.When we install APK file, Package Manager parse the package(APK) file and display confirmation, When user press OK button, Package Manager call method named "installPackage" with these four parameters namely uri, installFlags, observer, installPackageName. Package Manager start one service named "package", now all fuzzy things happen in this service. you can check "PackageInstallerActivity.java" and "InstallAppProgress.java" in PackageInstaller source code. Package Manager Service running in system_service process and  install daemon (installd) that runs as a native process both start at system boot time.


2. Where APK files stores in Android ?

1. Pre-Install (i.e. Camera, Calendar, Browser,etc.) APK stored in /system/app/
2. User Install (ApiDemo, Any.do, etc.) APK stored in /data/app/
3. Package Manager create data directory /data/data/<package name>/  to store database, shared preference, native library and cache data

You might see apk file and *.odex file for same APK, ODEX file is totally different discussion and purpose.

3. What is APK installation process in detail ?

Following process execute in Package Manager Service.

- Waiting 
- Add a package to the queue for the installation process 
- Determine the appropriate location of the package installation 
- Determine installation Install / Update new 
- A copy of the apk file to a given directory 
- Determine the UID of the app 
- Request to installd daemon process 
- Create the application directory and set permissions 
- Extraction of dex code to the cache directory 
- To reflect and packages.list / system / data / packages.xml the latest status 
- Broadcast to the system along with the name of the effect of the installation is complete package 
Intent.ACTION_PACKAGE_ADDED: If the new ( Intent.ACTION_PACKAGE_REPLACED): the case of an update


4. How Package Manager store data ?

Package Manager store application information in three files, located in  /data/system. Following sample is extracted from Android 4 ICS emulator image.

1. packages.xml :This file contain list of permissions and Packages/Applications. 


.
.
.
.


.
.
.
.


.
.
.
.
.

This xml file stores two things 1. permissions 2. package (application), permission are store under <permissions> tag. Each Permission has three attributes namely name, package and protection. Name attribute has permission name which we are using in AndroidManifest.xml, package attribute indicate permission belong to package, In majority cases "android" is values because <permission> tag contain default permissions and protection indicate level of security.

package tag contain 10 attributes and few sub tags.

SrAttribute NameDescription
1namepackage name
2codePathAPK file installation location (/system/app/ or /data/app/)
3nativeLibraryPath native library (*.so file) default path is /data/data/<package name>/lib/
4flagStore ApplicationInfo Flags [http://developer.android.com/reference/android/content/pm/ApplicationInfo.html]
5fttimestamp in hex format
6lttimestamp in hex format of first time installation
7uttimestamp in hex format of last update
8versionVersion Code from AndroidManifest.xml file []http://developer.android.com/guide/topics/manifest/manifest-element.html#vcode]
9sharedUserIdThe name of Linux user ID that will be shared with other applications, It is same parameter which we define in AndroidManifest.xml [http://developer.android.com/guide/topics/manifest/manifest-element.html#uid]
10userIdThe name of a Linux user ID

Sub Tags
1. sigssignature information, count attribute represent number of cert tag.
2. cert  contain certification key , index attribute represent global index of certificate, I observer that it increment when new certificate install with application.
3. perms contain permission which developer has set in AndroidManifest.xml

2. packages.list : It is simple text file contain package name, user id ,flag and data directory, I can't find any perfect description but I assume it that packages.list file may provide faster lookup of installed package because it file keep important information only.

com.android.launcher 10013 0 /data/data/com.android.launcher
com.android.quicksearchbox 10033 0 /data/data/com.android.quicksearchbox
com.android.contacts 10001 0 /data/data/com.android.contacts
com.android.inputmethod.latin 10006 0 /data/data/com.android.inputmethod.latin

3. packages-stoped.xml : This file contain package list which has stopped state, Stope stated applications can not receive any broadcast. Refer this link for more information about stopped state application http://yuki312.blogspot.in/2012/03/androidbroadcaststop.html 


4. Where I can find the source code of Package Manager and Package Installer ?

Package Manager

Package Installer
packages/apps/PackageInstaller/src/com/android/packageinstaller/InstallAppProgress.java 

Java-Android Static Import

$
0
0
Static import as named suggest It is use to import static variables and methods. Normally, we access static methods and variables through qualified reference with the class it come from.

Syntax

import static <package>.<class>;

Example

import static android.util.Log.*;

Static imports allows us to use static methods and variable without qualified reference. Static imports also support wildcard characters. In below code depicted static import of Log class and Color class.

import android.app.Activity;

import android.os.Bundle;
import static android.util.Log.*; // static import
import static android.graphics.Color.*; // static import

public class TestActivity extends Activity {
@Override
public void onCreate(Bundle savedInstanceState) {
super.onCreate(savedInstanceState);
setContentView(R.layout.main);

i("TAG","Hello"); // static method without qualified class name
i("Tag","Red Color :" + RED); // static variable RED without qualified class name
}
}

Notes

1. With static imports, We can use static variables and methods as local variables and methods.
2. We are not allowed to declare same variable name in class, for example, in above code I can not declare local variable named RED.
If I do, compiler generate "java.lang.ExceptionInInitializerError" Error.
3. Readability : It very personal choice, some developer things that static import increase readability but personally I think static import does not improve readability.
4. Ambiguity static import is not allowed for example import static android.graphics.Color.RED; and import static some.other.package.RED

Reference http://docs.oracle.com/javase/1.5.0/docs/guide/language/static-import.html

In Depth : Android Boot Sequence / Process

$
0
0

What happened when I press power on button in my Android device ?
What is Android boot sequence ?
What is linux kernel ?
What is different between desktop linux kernel and Android linux kernel ?
What is bootloader ?
What is Zygote ?
What is x86 and ARM linux ?
What is init.rc ?
What is System Server ?

Many questions pop-up in mind when we think about Android boot sequence.

Here I am explaining Android boot process. I hope you will find answer of above questions.


Android is linux based open source operating system, x86 (x86 is a series of computer microprocessor instruction set architectures based on the Intel 8086 CPU.) is most likely system where linux kernel is deployed however all Android devices are running on ARM process (ARM (formerly Advanced RISC Machine, which was formerly Acorn RISC Machine)) except Intel’s Xolo device (http://xolo.in/xolo-x900-features). Xolo comes with Atom 1.6 GHz x86 processor. Android boot sequence or I can say embedded device or ARM based linux has minor difference compare to desktop version.  In this article I am going to explain boot sequence for Android only. Inside the linux boot process is good article for desktop based linux boot sequence.
Android device execute following steps when you press power switch
Android Boot Sequence / Process
Step 1 : Power On and System Startup

When power start Boot ROM code start execution from pre defined location which is hardwired on ROM. It load Bootloader into RAM and start execution

Step 2 : Bootloader

Bootloader is small program which runs before Android operating system running. Bootloader is first program to run so It is specific for board and processor. Device manufacturer either use popular bootloaders like redboot,uboot, qi bootloader or they develop own bootloaders, It’s not part of Android Operating System. bootloader is the place where OEMs and Carriers put there locks and restrictions.

Bootloader perform execution in two stages, first stage It to detect external RAM and load program which helps in second stage, In second stage bootloader setup network, memory, etc. which requires to run kernel, bootloader is able to provide configuration parameters or inputs to the kernel for specific purpose.  

Android bootloader can be found at 
<Android Source>\bootable\bootloader\legacy\usbloaderlegacy loader contain two important files that need to address here.
1. init.s - Initializes stacks, zeros the BSS segments, call _main() in main.c
2. main.c - Initializes hardware (clocks, board, keypad, console), creates Linux tags

Refer this link to know more about Android bootloader :
https://motorola-global-portal.custhelp.com/app/answers/detail/a_id/86208/~/bootloader-frequently-asked-questions

Step 3: Kernel

Android kernel start similar way as desktop linux kernel starts, as kernel launch it start setup cache, protected memory, scheduling, loads drivers. When kernel finish system setup first thing it look for “init” in system files and launch root process or first process of system.  

Step 4: init process

init it very first process, we can say it is root process or grandmother of all processes. init process has two responsibilities 1. mount directories like /sys, /dev, /proc and 2. run init.rc script.

  • init process can be found at init : <android source>/system/core/init
  • init.rc file can be found in source tree at <android source>/system/core/rootdir/init.rc
  • readme.txt file can be found in source tree at <andorid source>/system/core/init/readme.txt

Android has specific format and rules for init.rc files. In Android we call it as “Android Init Language”

The Android Init Language consists of four broad classes of statements,which are Actions, Commands, Services, and Options.

Action : Actions are named sequences of commands.  Actions have a trigger which is used to determine when the action should occur.

Syntax
on <trigger>
  <command>
  <command>
  <command>

Service :  Services are programs which init launches and (optionally) restarts when they exit.  Syntax

service <name> <pathname> [ <argument> ]*
  <option>
  <option>
  ...

Options : Options are modifiers to services.  They affect how and when init runs the service.

Let’s take a look of default init.rc file. Here I have listed only major events and services.


Action / ServiceDescription
on early-initSet init and its forked children's oom_adj.
Set the security context for the init process.
on initsetup the global environment
Create cgroup mount point for cpu accounting
and many
on fsmount mtd partitions
on post-fschange permissions of system directories
on post-fs-datachange permission of /data folders and sub folders
on bootbasic network init ,Memory Management ,etc
service servicemanagerstart system manager to manage all native services like location, audio, shared preference etc..
service zygotestart zygote as app_process

At this stage you can see “Android” logo on device screen.

Step 5: Zygote and Dalvik

In a Java, We know that separate Virtual Machine(VMs) instance will popup in memory for separate per app, In case of Android app should launch as quick as possible, If Android os launch different instance of Dalvik VM for every app then it consume lots of memory and time. so, to overcome this problem Android OS as system named “Zygote”. Zygote enable shared code across Dalvik VM, lower memory footprint and minimal startup time. Zygote is a VM process that starts at system boot time as we know in previous step. Zygote preloads and initialize core library classes.  Normally there core classes are read-only and part of Android SDK or Core frameworks. In Java VM each instance has it’s own copy of core library class files and heap objects.

Zygote loading process

1. Load ZygoteInit class,
Source Code :<Android Source> /frameworks/base/core/java/com/android/internal/os/ZygoteInit.java
2. registerZygoteSocket() -  Registers a server socket for zygote command connections
3. preloadClasses() - “preloaded-classes” is simple text file contains list of classes that need to be preloaded, you cna find “preloaded-classes” file at <Android Source>/frameworks/base
4. preloadResources() - preloadReaources means native themes and layouts, everything that include android.R file will be load using this method.

At this time you can see bootanimation

Step 6: System  Service or Services

After complete above steps, runtime request Zygote to launch system servers. System Servers are written in native and java both, System servers we can consider as process, The same system server is available as System Services in Android SDK. System server contain all system services.

Zygote fork new process to launch system services. You can find source code in ZygoteInit class and “startSystemServer” method.

Core Services:
1.     Starting Power Manager
2.     Creating Activity Manager
3.     Starting Telephony Registry
4.     Starting Package Manager
5.     Set Activity Manager Service as System Process
6.     Starting Context Manager
7.     Starting System Context Providers
8.     Starting Battery Service
9.     Starting Alarm Manager
10.   Starting Sensor Service
11.   Starting Window Manager
12.   Starting Bluetooth Service
13.   Starting Mount Service

Other services
1.    Starting Status Bar Service
2.     Starting Hardware Service
3.     Starting NetStat Service
4.     Starting Connectivity Service
5.     Starting Notification Manager
6.     Starting DeviceStorageMonitor Service
7.     Starting Location Manager
8.     Starting Search Service
9.     Starting Clipboard Service
10.   Starting Checkin Service
11.   Starting Wallpaper Service
12.   Starting Audio Service
13.   Starting HeadsetObserver
14.   Starting AdbSettingsObserver
Step 7 : Boot Completed

Once System Services up and running in memory, Android has completed booting process, At this time “ACTION_BOOT_COMPLETED” standard broadcast action will fire.


Android API Differences between 16 and 17 : Part-1

$
0
0
The overall difference between API Levels 16 and 17 is approximately 1.26% only.

The table below lists the numbers of program elements (packages, classes, constructors, methods, and fields) that were added, changed, or removed. The table includes only the highest-level program elements — that is, if a class with two methods was added, the number of methods added does not include those two methods, but the number of classes added does include that class.


TypeAdditionsChangesRemovalsTotal
Packages235037
Classes and Interfaces411112154
Constructors2103
Methods1503719206
Fields155693227
Total35025324627


Android API Differences between 16 and 17 : Part-2

$
0
0

Android API Differences between 16 and 17 : Part-3

$
0
0

List of Added Classes,methods and fields in Android API 17 (A to R)

apply
createBitmap
createConfigurationContext
createDisplayContext
dispatchGenericMotionEvent
extendVerificationTimeout
FLAG_SINGLE_USER
flags
getCreatorPackage
getCreatorUid
getCreatorUserHandle
getLabelFor
getLayoutDirection
getTextLocale
glGetActiveAttrib
glGetActiveUniform
initialKeyguardLayout
isDestroyed
removeStickyBroadcastAsUser

Android API Differences between 16 and 17 : Part-4

$
0
0

List of Added Classes,methods and fields in Android API 17 (S to Z)

sendBroadcastAsUser
sendOrderedBroadcastAsUser
sendStickyBroadcastAsUser
sendStickyOrderedBroadcastAsUser
setCompoundDrawablesRelativeWithIntrinsicBounds
setLabeledBy
setLabelFor
setLayoutDirection
setOnDismissListener
setTextLocale
widgetCategory

Android Annotation

$
0
0
What is Annotation ?
Annotation in Programming Language ?
History of Annotation in Java ?
Use of Annotation ?
Can I use Java’s Annotation in Android ?
Is there any Annotation framework available for Android ?


What is Annotation ?
“An annotation is a note that is made while reading any form of text.” Standard definition of Annotation.

Annotation in Programming Language ?
“Initially annotation was mainly use to extend documents and comments, Annotation was ignored in compile and execution process, Today annotation is greatly improved in language like Java, C#,etc. Many functionality and frameworks are build upon annotation. Annotations offer a way to associate metadata with program elements i.e. classes, interfaces, and methods. They can be thought of as additional modifiers without changing the generated code for those elements.” - Annotation in Programming Language

History of Annotation in Java ?

In Java annotation was introduction as JSR-175 in 2002 as named Metadata Facilities of Java Programming language, It was approved in 2004 by JCP. Till this date annotation was ignored by compiler and used to build javadoc, now it is not possible to ignore annotation so that JSR-269 was submitted in 2005 to make provision to process annotation at compile time. JSR-269 was  approved in 2006 after that Annotation was official part of Java language and shipped with JDK 1.5

Use of Annotation ?

  • Generate API Document - Annotation can be use in documentation.
  • Information for the compiler— Annotations can be used by the compiler to detect errors or suppress warnings.
  • Compiler-time and deployment-time processing— Software tools can process annotation information to generate code, XML files, and so forth.
  • Runtime processing— Some annotations are available to be examined at runtime, few frameworks are based on Annotation, Servlet 3.0 for configuration.

Can I use Java’s Annotation in Android ?
Only few basic annotation like @Override can be used in newer version.

Is there any Annotation framework available for Android ?
Yes, Android Annotation [ http://androidannotations.org/ ] is good framework.

Android Annotation

It is good annotation library which allow you to manage and maintain all Android specific objects with annotation.

Referring UI Element Example

// without annotation

Button btn = (Button) findViewById(R.id.mybutton);
// with annotation
@ViewId
Button btn;


Features

  • Dependency injection: inject views, extras, system services, resources, ...
  • Simplified threading model: annotate your methods so that they execute on the UI thread or on a background thread.
  • Event binding: annotate methods to handle events on views, no more ugly anonymous listener classes!
  • REST client: create a client interface, AndroidAnnotations generates the implementation.
  • AndroidAnnotations provide those good things and even more for less than 50kb, without any runtime perf impact!

To Learn AndroidAnnotation Visit following links


YouTube Android Player API Tutorial

$
0
0

YouTube Android API is experimental
"The YouTube Android Player API is an experimental API version, which means it is still in development, though we do not expect major interface changes. Until the experimental label is removed, the Deprecation Policy for YouTube APIs won't apply to this version as discussed in the API Terms of Service."

Note:
  • Users need to run version 4.2.16 of the mobile YouTube app (or higher) to use the API.
  • Change API Key before compiling & running source code.
Let's make simple demo using YouTube Android API. Demo contains one EditText and YouTubePlayerView. Just Provide YouTube video id and press "Go" button to start video.


Step 1 : Download YouTube Android API :  download

Step 2 : Create Android Project named "YouTubeAPIDemo" using eclipse.

Step 3 : Register this demo to get API key

https://developers.google.com/youtube/android/player/register

Step 3 : Unzip YouTube Android API.
             Go to folder -> libs
             Copy "YouTubeAndroidPlayerApi.jar"
             Paste in Android Project : YouTubeAPIDemo->libs
             Right click on YouTubeAndroidPlayerApi.jar -> Build Path -> Add to build path.

 Step 4 : Add YouTube Video Player View in activity_main.xml, player view display in bold.


<RelativeLayout xmlns:android="http://schemas.android.com/apk/res/android"
xmlns:tools="http://schemas.android.com/tools"
android:layout_width="match_parent"
android:layout_height="match_parent"
tools:context=".MainActivity" >
<TextView
android:id="@+id/textView1"
android:layout_width="fill_parent"
android:layout_height="wrap_content"
android:layout_alignParentLeft="true"
android:layout_alignParentTop="true"
android:background="#C0C0C0"
android:text="Enter Only Video ID in below EditText example : https://www.youtube.com/watch?v=fhWaJi1Hsfo"
android:textAppearance="?android:attr/textAppearanceLarge" />
<EditText
android:id="@+id/eturl"
android:layout_width="wrap_content"
android:layout_height="wrap_content"
android:layout_alignParentLeft="true"
android:layout_alignParentRight="true"
android:layout_below="@+id/textView1"
android:hint="Enter YouTube URL and Press Enter"
android:text="fhWaJi1Hsfo"
android:singleLine="true"
android:imeOptions="actionGo" >
</EditText>

<com.google.android.youtube.player.YouTubePlayerView
android:id="@+id/youtubeplayer"
android:layout_width="fill_parent"
android:layout_height="fill_parent"
android:layout_below="@+id/eturl"
>
</com.google.android.youtube.player.YouTubePlayerView>

</RelativeLayout>

Step 5 : Let's modify main activity code


package com.kpbird.youtubeapidemo;

import android.os.Bundle;
import android.view.KeyEvent;
import android.view.inputmethod.EditorInfo;
import android.widget.EditText;
import android.widget.TextView;
import android.widget.TextView.OnEditorActionListener;
import android.widget.Toast;

import com.google.android.youtube.player.YouTubeBaseActivity;
import com.google.android.youtube.player.YouTubeInitializationResult;
import com.google.android.youtube.player.YouTubePlayer;
import com.google.android.youtube.player.YouTubePlayer.Provider;
import com.google.android.youtube.player.YouTubePlayerView;

public class MainActivity extends YouTubeBaseActivity
implements YouTubePlayer.OnInitializedListener,OnEditorActionListener {

private YouTubePlayerView ytpv;
private YouTubePlayer ytp;
private EditText et;
@Override
protected void onCreate(Bundle savedInstanceState) {
super.onCreate(savedInstanceState);
setContentView(R.layout.activity_main);
ytpv = (YouTubePlayerView) findViewById(R.id.youtubeplayer);
ytpv.initialize("AIzaSyC-R09MYt2HS82nxKuFCzvNgC60DnxFcqM", this);

et = (EditText) findViewById(R.id.eturl);
et.setOnEditorActionListener(this);
}

@Override
public void onInitializationFailure(Provider arg0,YouTubeInitializationResult arg1) {
Toast.makeText(this, "Initialization Fail", Toast.LENGTH_LONG).show();
}

@Override
public void onInitializationSuccess(Provider provider, YouTubePlayer player,boolean wasrestored) {
ytp = player;
Toast.makeText(this, "Initialization Success", Toast.LENGTH_LONG).show();
}

@Override
public boolean onEditorAction(TextView v, int actionId, KeyEvent event) {
if(actionId == EditorInfo.IME_ACTION_GO ){
if(ytp !=null){
ytp.loadVideo(et.getText().toString());
}
}
return false;
}
}
  • Extends class with YouTubeBaseActivity
  • Implements YouTubePlayer.OnInitializedListener 
  • Call initialize method with API key and class object
  • YouTubePlayer.loadVideo(<video id>)
You have to use YouTubeBaseActivity instand of Activity and implement interface named "YouTubePlayer.OnInitializedListener" to check initialization status and to get YouTubePlayer control.

Download Demo : Click
[ File->Download to download entire zip file]

Reference
  1. https://developers.google.com/youtube/android/player/
  2. https://developers.google.com/youtube/android/player/register
  3. https://developers.google.com/youtube/android/player/register


Android Instagram Integration

$
0
0
Note: There is no direct api/library available to share with Instragram as per http://instagram.com/developer/
In this post I am using ACTION_SHARE Intent to share image to Instragram. I have demonstrated two ways to share image, 1. From Gallery 2. From SD Card.


Step 1 : Create Android Project in Eclipse, named "AndroidInstragramDemo"
Step 2 : Open activity_main.xml file and add two buttons for gallery and sd card.
<RelativeLayout xmlns:android="http://schemas.android.com/apk/res/android"
xmlns:tools="http://schemas.android.com/tools"
android:layout_width="match_parent"
android:layout_height="match_parent"
tools:context=".MainActivity" >

<Button
android:id="@+id/btngallery"
android:layout_width="wrap_content"
android:layout_height="wrap_content"
android:layout_alignParentLeft="true"
android:layout_alignParentRight="true"
android:layout_alignParentTop="true"
android:onClick="buttonClicked"
android:text="Share from Gallery" />

<Button
android:id="@+id/btnsdcard"
android:layout_width="wrap_content"
android:layout_height="wrap_content"
android:layout_alignParentLeft="true"
android:layout_alignParentRight="true"
android:layout_below="@+id/btngallery"
android:onClick="buttonClicked"
android:text="Share from SD Card" />

</RelativeLayout>
Step 3 : Open MainActivity.java file and write following code.
package com.kpbird.androidinstagramdemo;

import java.util.List;

import android.app.Activity;
import android.content.ComponentName;
import android.content.Intent;
import android.content.pm.ActivityInfo;
import android.content.pm.ApplicationInfo;
import android.content.pm.PackageManager;
import android.content.pm.ResolveInfo;
import android.net.Uri;
import android.os.Bundle;
import android.os.Environment;
import android.view.View;
import android.widget.Toast;

public class MainActivity extends Activity {

@Override
protected void onCreate(Bundle savedInstanceState) {
super.onCreate(savedInstanceState);
setContentView(R.layout.activity_main);
}

// Listener for Button Clicked - Defined in button:onClilck property
public void buttonClicked(View v) {

// Let's check Instagram is installed or not
if (!appInstalledOrNot()) {
Toast.makeText(this, "Instagram Application is not installed",Toast.LENGTH_LONG).show();
return;
}

if (v.getId() == R.id.btngallery) {
shareFromGallery(); // share image from gallery

} else if (v.getId() == R.id.btnsdcard) {
shareFromSDCard(); // share image from sdcard
}
}

// This method use PackageManager Class to check for instagram package.
private boolean appInstalledOrNot() {

boolean app_installed = false;
try {
ApplicationInfo info = getPackageManager().getApplicationInfo("com.instagram.android", 0);
app_installed = true;
} catch (PackageManager.NameNotFoundException e) {
app_installed = false;
}
return app_installed;
}

// This method invoke gallery or any application which support image/* mime type
private void shareFromGallery(){
Intent intent = new Intent();
intent.setType("image/*");
intent.setAction(Intent.ACTION_GET_CONTENT);
startActivityForResult(Intent.createChooser(intent, "Select Picture"), 0);
}
// this method share test.jpg file from sd card
private void shareFromSDCard(){
shareInstagram(Uri.parse("file://"+Environment.getExternalStorageDirectory()+"/test.jpg"));
}

@Override
protected void onActivityResult(int requestCode, int resultCode, Intent data) {
Uri uri = data.getData();
shareInstagram(uri);
}

// this mathod actually share image to Instagram, It accept Uri
private void shareInstagram(Uri uri){
Intent shareIntent = new Intent(android.content.Intent.ACTION_SEND);
shareIntent.setType("image/*"); // set mime type
shareIntent.putExtra(Intent.EXTRA_STREAM,uri); // set uri
shareIntent.setPackage("com.instagram.android");
startActivity(shareIntent);
}
}

There are two methods to set package name
Method 1 : Optimized and Clean
private void shareInstagram(Uri uri){
Intent shareIntent = new Intent(android.content.Intent.ACTION_SEND);
shareIntent.setType("image/*"); // set mime type
shareIntent.putExtra(Intent.EXTRA_STREAM,uri); // set uri
shareIntent.setPackage("com.instagram.android");
startActivity(shareIntent);
}

Method 2 : Loop for select package
private void shareInstagram(Uri uri){
// Intent for action_send
Intent shareIntent = new Intent(android.content.Intent.ACTION_SEND);
shareIntent.setType("image/*"); // set mime type
shareIntent.putExtra(Intent.EXTRA_STREAM,uri); // set uri

//following logic is to avoide option menu, If you remove following logic then android will display list of application which support image/* mime type
PackageManager pm = getPackageManager();
List<ResolveInfo> activityList = pm.queryIntentActivities(shareIntent, 0);
for (final ResolveInfo app : activityList) {
if ((app.activityInfo.name).contains("instagram")) { // search for instagram from app list
final ActivityInfo activity = app.activityInfo;
final ComponentName name = new ComponentName(activity.applicationInfo.packageName, activity.name);
shareIntent.addCategory(Intent.CATEGORY_LAUNCHER);
shareIntent.setFlags(Intent.FLAG_ACTIVITY_NEW_TASK | Intent.FLAG_ACTIVITY_RESET_TASK_IF_NEEDED);
shareIntent.setComponent(name); // set component
startActivity(shareIntent);
break;
}
}
}
I assume that It is very simple code and It does not require explanation.

Note:
  • We can not check login status of user.
  • We can't have share status whether user has actually share image or not
  • After image share Instagram App remain on Screen, User need to press back button display our app.
Download Source Code
[To Download : Click File Menu -> Download]
Source from Github

Android Google Play Service : Authorization

$
0
0
Google Play Service, the most promising release for me. I wish google play service will get accepted as a regular practice by developers and users in app for authentication. 

Google Play Service has three major APIs
  1. Authorization 
  2. Google+
  3. Google Maps
This tutorial contains explanation of Authorization API. It's standard way to authorize your user, It leverage existing Google Play Accounts. 

This demo app has four buttons 
  1. isGooglePlayServiceAvailable() - To check availability of google play service.
  2. Get Account Name - To allow user to select gmail account (popup will display only if user has configured multiple gmail accounts)
  3. getToken() - To fetch authorization token.
  4. invalidateToken() - To invalidate token.
Read following link to know "How Google Play Service works?"
http://developer.android.com/google/play-services/index.html  


Flow of Google Play Service : Authorization API


Above flow chart illustrates google play service authorization process, It has four major steps.
  1. Check Google Play Service available
  2. Select Gmail Account
  3. Ask for Permission
  4. Get Token
When you call GoogleAuthUtil.getToken(), for the first time, it throws UserRecoverableAuthException with one intent, you need to start activity with that intent to ask permission from user.

"UserRecoverableAuthException: This exception is thrown when an error occurs that users can resolve, such as not yet granting access to their accounts or if they changed their password. This exception class contains a getIntent() method that you can call to obtain an intent that you can use withstartActivityForResult() to obtain the user's resolution. You will need to handle theonActivityResult() callback when this activity returns to take action based on the user's actions."

I can't figure out reason why Google Play Service throws exception for first time to ask permission,There should be methods to check permission and grant permission

Step 1 : Download Google Play Service  

Google Play Service is not a part of Android SDK so you need to download library using Android SDK Manager. Read this like for more information http://developer.android.com/google/play-services/setup.html

Step 2 : Import Google Play Service library project from <Android SDK>/extras/google/google_play_services copy/libproject/google-play-services_lib

Step 3: Create Android project named "GooglePlayService" (Don't confuse with name It's project name)

Step 4 : Add Reference of Google Play Service Library in our project
Right click on project name -> select properties -> select Android -> Click on Add button -> select google play service libproject


Step 5 : make gui as display in screen shots, open activity_main.xml from layout
below layout has four buttons (namely btnCheckService, btnAccountName, btGetToken, btnInvalidate) for different actions and two textview to display gmail account and token.

<RelativeLayout xmlns:android="http://schemas.android.com/apk/res/android"
xmlns:tools="http://schemas.android.com/tools"
android:layout_width="match_parent"
android:layout_height="match_parent"
tools:context=".MainActivity" >

<Button
android:id="@+id/btnCheckService"
android:layout_width="wrap_content"
android:layout_height="wrap_content"
android:layout_alignParentLeft="true"
android:layout_alignParentRight="true"
android:layout_alignParentTop="true"
android:onClick="buttonClicked"
android:text=" isGooglePlayServicesAvailable()" />

<Button
android:id="@+id/btnAccountNames"
android:layout_width="wrap_content"
android:layout_height="wrap_content"
android:layout_alignParentLeft="true"
android:layout_alignParentRight="true"
android:layout_below="@+id/btnCheckService"
android:onClick="buttonClicked"
android:text="Get Account Names" />

<TextView
android:id="@+id/txtAccount"
android:layout_width="wrap_content"
android:layout_height="wrap_content"
android:layout_alignParentLeft="true"
android:layout_alignParentRight="true"
android:layout_below="@+id/btnAccountNames"
android:text="Selected Account"
android:textAppearance="?android:attr/textAppearanceLarge" />

<Button
android:id="@+id/btnGetToken"
android:layout_width="wrap_content"
android:layout_height="wrap_content"
android:layout_alignParentLeft="true"
android:layout_alignParentRight="true"
android:layout_below="@+id/txtAccount"
android:onClick="buttonClicked"
android:text="getToken" />

<TextView
android:id="@+id/txtToken"
android:layout_width="wrap_content"
android:layout_height="wrap_content"
android:layout_alignParentLeft="true"
android:layout_alignParentRight="true"
android:layout_below="@+id/btnGetToken"
android:text="Token"
android:textAppearance="?android:attr/textAppearanceLarge" />

<Button
android:id="@+id/btnInvalidate"
android:layout_width="wrap_content"
android:layout_height="wrap_content"
android:layout_alignParentLeft="true"
android:layout_alignParentRight="true"
android:layout_below="@+id/txtToken"
android:onClick="buttonClicked"
android:text="Invalidate Token" />

</RelativeLayout>

Step 6 : Edit MainActivity.java
package com.kpbird.googleplayservice;

import android.accounts.AccountManager;
import android.app.Activity;
import android.content.Intent;
import android.os.AsyncTask;
import android.os.Bundle;
import android.util.Log;
import android.view.View;
import android.widget.TextView;
import android.widget.Toast;

import com.google.android.gms.auth.GoogleAuthUtil;
import com.google.android.gms.auth.UserRecoverableAuthException;
import com.google.android.gms.common.AccountPicker;
import com.google.android.gms.common.ConnectionResult;
import com.google.android.gms.common.GooglePlayServicesUtil;

public class MainActivity extends Activity {

private TextView txtAccount;
private TextView txtToken;
private static final int USER_RECOVERABLE_AUTH = 5;
private static final int ACCOUNT_PICKER = 2;

@Override
protected void onCreate(Bundle savedInstanceState) {
super.onCreate(savedInstanceState);
setContentView(R.layout.activity_main);
txtAccount = (TextView) findViewById(R.id.txtAccount);
txtToken = (TextView) findViewById(R.id.txtToken);
}

public void buttonClicked(View v) {
if (v.getId() == R.id.btnCheckService) {
checkStatus();
} else if (v.getId() == R.id.btnAccountNames) {
getAccountNames();
} else if (v.getId() == R.id.btnGetToken) {
new GetAuthToken(this, txtAccount.getText().toString()).execute();
} else if(v.getId() == R.id.btnInvalidate){
GoogleAuthUtil.invalidateToken(this, txtToken.getText().toString());
}

}

public void checkStatus() {
int status = GooglePlayServicesUtil.isGooglePlayServicesAvailable(this);
switch (status) {
case ConnectionResult.SUCCESS:
Toast.makeText(this, "Success", Toast.LENGTH_SHORT).show();
break;
case ConnectionResult.SERVICE_MISSING:
Toast.makeText(this, "Service Missing", Toast.LENGTH_SHORT).show();
break;
case ConnectionResult.SERVICE_VERSION_UPDATE_REQUIRED:
Toast.makeText(this, "Service Version Update Required",
Toast.LENGTH_SHORT).show();
break;
case ConnectionResult.SERVICE_DISABLED:
Toast.makeText(this, "Service Disabled", Toast.LENGTH_SHORT).show();
break;
}
}

private void getAccountNames() {
Intent intent = AccountPicker.newChooseAccountIntent(null, null,
new String[] { "com.google" }, false, null, null, null, null);
startActivityForResult(intent, ACCOUNT_PICKER);
}

@Override
protected void onActivityResult(int requestCode, int resultCode, Intent data) {
if (requestCode == ACCOUNT_PICKER && resultCode == RESULT_OK) {
String accountName = data.getStringExtra(AccountManager.KEY_ACCOUNT_NAME);
txtAccount.setText(accountName);

} else if (requestCode == USER_RECOVERABLE_AUTH && resultCode == RESULT_OK) {
new GetAuthToken(this, txtAccount.getText().toString()).execute();
} else if (requestCode == USER_RECOVERABLE_AUTH && resultCode == RESULT_CANCELED) {
Toast.makeText(this, "User rejected authorization.",
Toast.LENGTH_SHORT).show();
}
}

class GetAuthToken extends AsyncTask {

private MainActivity mActivity;
private String mEmail;

public GetAuthToken(MainActivity mActivity, String mEmail) {
this.mActivity = mActivity;
this.mEmail = mEmail;
}

@Override
protected void onPreExecute() {
}

@Override
protected String doInBackground(Void... params) {
try {
Log.i("MainActivity", mEmail);
String token = GoogleAuthUtil.getToken(mActivity, mEmail,"oauth2:https://www.googleapis.com/auth/userinfo.profile");
Log.i("MainActivity", token);
return token;

} catch (UserRecoverableAuthException userRecoverableException) {
mActivity.startActivityForResult(userRecoverableException.getIntent(),USER_RECOVERABLE_AUTH);
} catch (Exception e) {
e.printStackTrace();
}
return null;
}

@Override
protected void onPostExecute(String result) {
if (result != null)
txtToken.setText(result);
}

}
}

Above code contain following important methods

  • buttonClicked : listener for all buttons.
  • checkStatus : It is use to check play service status, simple method contain only one call "
    GooglePlayServicesUtil.isGooglePlayServicesAvailable(this);"
  • getAccountName : It is use to pick account, There are two ways by which you can select an account 1. android.accounts.Account class 2. AccountPicker class. AccountPicker is an easy and clean method to pick an account. It displays picker dialog if use has multiple gmail accounts, whereupon it provides response in onActivityResult.
  • GetAuthToken (AsyncTask) : It use to fetch auth token in doInBackground method using
    GoogleAuthUtil.getToken(), When you run first time it will throw UserRecoverableAuthException exception with one intent. We need to startActivityForResult with the intent and we will get response in onActivityResult. We can take further action based on user's response. call getToken() second time if user accepts/allow application.
Download Source : Click
[To download zip file Click File menu ->Download]

Android Chips EditText , Token EditText and Bubble EditText - [Part 1]

$
0
0
Chips EditText, Token EditText, Bubble EditText, Spannable EditText and etc.. There are many names of this control. Whatever we call it but this control is not available in Android. I found many questions and solutions for this control. 

Few popular questions & solutions 
1] Roman Nurik : https://plus.google.com/113735310430199015092/posts/WUd7GrfZfiZ 
2] Android EditText Gmail like Field : http://stackoverflow.com/questions/13747809/android-edittext-gmail-like-to-field 
3] Android Labels or Bubbles in Edit Text : http://stackoverflow.com/questions/8090711/android-labels-or-bubbles-in-edittext/8128848#8128848 
4] Contact Bubble Edit Text : http://stackoverflow.com/questions/10812316/contact-bubble-edittext 

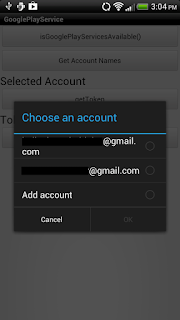
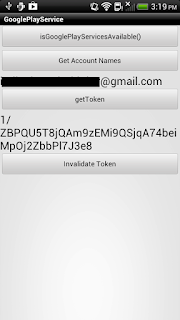
While I was reading above post, I thought that, I should develop Chips Edit Text control, which should be easy to understand and integrated in project. Here, My control is named as "Chips Edit Text". Before going to technical details, I would like to show few screenshots.


Step 1: Prerequisite

Android provides bunch of Span classes, Span classes are used to format text. I suggest to read following articles for helpful detail and in-depth understanding.

1] Introduction to Span
http://blog.stylingandroid.com/archives/177

2] Easy Method for Formatting Android
http://www.androidengineer.com/2010/08/easy-method-for-formatting-android.html

3] API Classes : Spannable, SpannableString, SpannableStringBuilder, ImageSpan ,ClickableSpan 

Step 2 : Logic

Our goal is to display background (border & fill with color) and image at right side of every chip. Android spannable classes allow us to set background color only. It does not support any drawable at background. Another problem is right side image. Android has ImageSpan class, we can display image at right side with ImageSpan but problem is that ImageSpan will consider as separate entity and it will display outside of background.

I have implemented following logic to overcome above two problems

1. Extends MultiAutoCompleteTextView to create chips edit text.
2. Generate TextView dynamically in code and set style & drawable at right side.
3. Capture image/bitmap of newly generated TextView.
4. Set ImageSpan instead-of country name. 

  
Step 3 : Create Android Project

Create Android project named "Chips Edit Text" 

Step 4 : Create class named "ChipsMultiAutoCompleteTextview.java"


package com.kpbird.chipsedittext;

import android.app.Activity;
import android.content.Context;
import android.graphics.Bitmap;
import android.graphics.Canvas;
import android.graphics.drawable.BitmapDrawable;
import android.text.Editable;
import android.text.Spannable;
import android.text.SpannableStringBuilder;
import android.text.TextWatcher;
import android.text.style.ImageSpan;
import android.util.AttributeSet;
import android.util.Log;
import android.view.LayoutInflater;
import android.view.View;
import android.widget.AdapterView;
import android.widget.AdapterView.OnItemClickListener;
import android.widget.MultiAutoCompleteTextView;
import android.widget.TextView;

public class ChipsMultiAutoCompleteTextview extends MultiAutoCompleteTextView implements OnItemClickListener {

private final String TAG = "ChipsMultiAutoCompleteTextview";

// Constructor
public ChipsMultiAutoCompleteTextview(Context context) {
super(context);
init(context);
}
// Constructor
public ChipsMultiAutoCompleteTextview(Context context, AttributeSet attrs) {
super(context, attrs);
init(context);
}
// Constructor
public ChipsMultiAutoCompleteTextview(Context context, AttributeSet attrs,
int defStyle) {
super(context, attrs, defStyle);
init(context);
}
// set listeners for item click and text change
public void init(Context context){
setOnItemClickListener(this);
addTextChangedListener(textWather);
}
// TextWatcher, If user type any country name and press comma then following code will regenerate chips
private TextWatcher textWather = new TextWatcher() {

@Override
public void onTextChanged(CharSequence s, int start, int before, int count) {
if(count >=1){
if(s.charAt(start) == ',')
setChips(); // generate chips
}
}
@Override
public void beforeTextChanged(CharSequence s, int start, int count,int after) {}
@Override
public void afterTextChanged(Editable s) {}
};
//This function has whole logic for chips generate
public void setChips(){
if(getText().toString().contains(",")) // check comman in string
{

SpannableStringBuilder ssb = new SpannableStringBuilder(getText());
// split string wich comma
String chips[] = getText().toString().trim().split(",");
int x =0;
// loop will generate ImageSpan for every country name separated by comma
for(String c : chips){
// inflate chips_edittext layout
LayoutInflater lf = (LayoutInflater) getContext().getSystemService(Activity.LAYOUT_INFLATER_SERVICE);
TextView textView = (TextView) lf.inflate(R.layout.chips_edittext, null);
textView.setText(c); // set text
setFlags(textView, c); // set flag image
// capture bitmapt of genreated textview
int spec = MeasureSpec.makeMeasureSpec(0, MeasureSpec.UNSPECIFIED);
textView.measure(spec, spec);
textView.layout(0, 0, textView.getMeasuredWidth(), textView.getMeasuredHeight());
Bitmap b = Bitmap.createBitmap(textView.getWidth(), textView.getHeight(),Bitmap.Config.ARGB_8888);
Canvas canvas = new Canvas(b);
canvas.translate(-textView.getScrollX(), -textView.getScrollY());
textView.draw(canvas);
textView.setDrawingCacheEnabled(true);
Bitmap cacheBmp = textView.getDrawingCache();
Bitmap viewBmp = cacheBmp.copy(Bitmap.Config.ARGB_8888, true);
textView.destroyDrawingCache(); // destory drawable
// create bitmap drawable for imagespan
BitmapDrawable bmpDrawable = new BitmapDrawable(viewBmp);
bmpDrawable.setBounds(0, 0,bmpDrawable.getIntrinsicWidth(),bmpDrawable.getIntrinsicHeight());
// create and set imagespan
ssb.setSpan(new ImageSpan(bmpDrawable),x ,x + c.length() , Spannable.SPAN_EXCLUSIVE_EXCLUSIVE);
x = x+ c.length() +1;
}
// set chips span
setText(ssb);
// move cursor to last
setSelection(getText().length());
}


}
@Override
public void onItemClick(AdapterView parent, View view, int position, long id) {
setChips(); // call generate chips when user select any item from auto complete
}

// this method set country flag image in textview's drawable component, this logic is not optimize, you need to change as per your requirement
public void setFlags(TextView textView,String country){
country = country.trim();
if(country.equals("India")){
textView.setCompoundDrawablesWithIntrinsicBounds(0, 0, R.drawable.india, 0);
}
else if(country.equals("United States")){
textView.setCompoundDrawablesWithIntrinsicBounds(0, 0, R.drawable.unitedstates, 0);
}
else if(country.equals("Canada")){
textView.setCompoundDrawablesWithIntrinsicBounds(0, 0, R.drawable.canada, 0);
}
else if(country.equals("Australia")){
textView.setCompoundDrawablesWithIntrinsicBounds(0, 0, R.drawable.australia, 0);
}
else if(country.equals("United Kingdom")){
textView.setCompoundDrawablesWithIntrinsicBounds(0, 0, R.drawable.unitedkingdom, 0);
}
else if(country.equals("Philippines")){
textView.setCompoundDrawablesWithIntrinsicBounds(0, 0, R.drawable.philippines, 0);
}
else if(country.equals("Japan")){
textView.setCompoundDrawablesWithIntrinsicBounds(0, 0, R.drawable.japan, 0);
}
else if(country.equals("Italy")){
textView.setCompoundDrawablesWithIntrinsicBounds(0, 0, R.drawable.japan, 0);
}
else if(country.equals("Germany")){
textView.setCompoundDrawablesWithIntrinsicBounds(0, 0, R.drawable.germany, 0);
}
else if(country.equals("Russia")){
textView.setCompoundDrawablesWithIntrinsicBounds(0, 0, R.drawable.russia, 0);
}
else if(country.equals("Malaysia")){
textView.setCompoundDrawablesWithIntrinsicBounds(0, 0, R.drawable.malaysia, 0);
}
else if(country.equals("France")){
textView.setCompoundDrawablesWithIntrinsicBounds(0, 0, R.drawable.france, 0);
}
else if(country.equals("Sweden")){
textView.setCompoundDrawablesWithIntrinsicBounds(0, 0, R.drawable.sweden, 0);
}
else if(country.equals("New Zealand")){
textView.setCompoundDrawablesWithIntrinsicBounds(0, 0, R.drawable.newzealand, 0);
}
else if(country.equals("Singapore")){
textView.setCompoundDrawablesWithIntrinsicBounds(0, 0, R.drawable.singapore, 0);
}


}

}

Step 5 : Create drawable shape for chip named "chips_edittext_bg.xml" in drawable folder.


<?xml version="1.0" encoding="utf-8"?>
<shape xmlns:android="http://schemas.android.com/apk/res/android" >

<stroke
android:width="1dp"
android:color="#A6B0B8" />

<solid android:color="#E5E5E6" />

<corners
android:bottomLeftRadius="3dp"
android:bottomRightRadius="3dp"
android:topLeftRadius="3dp"
android:topRightRadius="3dp" >
</corners>

</shape>

Step 6 : Create TextView layout for chip named "chips_edittext.xml" in layout folder


<?xml version="1.0" encoding="UTF-8"?>
<TextView xmlns:android="http://schemas.android.com/apk/res/android"
android:id="@+id/edtTxt1"
android:layout_width="wrap_content"
android:layout_height="wrap_content"
android:background="@drawable/chips_edittext_gb"
android:drawablePadding="2dp"
android:drawableRight="@drawable/android"
android:padding="8dp"
android:shadowColor="#FFFFFF"
android:shadowDy="1"
android:shadowRadius="0.01"
android:textColor="#000000"
android:textSize="18sp"
android:textStyle="bold" />

Step 7 : Create string array for multi select data named "country" in strings.xml 


<string-array name="country">
<item >India</item>
<item>United States</item>
<item>Canada</item>
<item>Australia</item>
<item>United Kingdom</item>
<item>Philippines</item>
<item >Japan</item>
<item>Italy</item>
<item>Germany</item>
<item>Russia</item>
<item>Malaysia</item>
<item>France</item>
<item>Sweden</item>
<item>New Zealand</item>
<item>Singapore</item>
</string-array>

Step 8 : Edit layout of main_activity.xml file


<RelativeLayout xmlns:android="http://schemas.android.com/apk/res/android"
xmlns:tools="http://schemas.android.com/tools"
android:layout_width="match_parent"
android:layout_height="match_parent"
tools:context=".MainActivity" >
<com.kpbird.chipsedittext.ChipsMultiAutoCompleteTextview
android:id="@+id/multiAutoCompleteTextView1"
android:layout_width="wrap_content"
android:layout_height="wrap_content"
android:layout_alignParentLeft="true"
android:layout_alignParentRight="true"
android:layout_alignParentTop="true"
android:ems="10"
/>
<Button
android:id="@+id/button1"
android:layout_width="wrap_content"
android:layout_height="wrap_content"
android:layout_alignParentLeft="true"
android:layout_alignParentRight="true"
android:layout_below="@+id/multiAutoCompleteTextView1"
android:onClick="buttonClicked"
android:text="@string/getvalue" />
<TextView
android:id="@+id/textView1"
android:layout_width="wrap_content"
android:layout_height="wrap_content"
android:layout_alignParentLeft="true"
android:layout_alignParentRight="true"
android:layout_below="@+id/button1"
android:text="@string/selectedcountries"
android:textAppearance="?android:attr/textAppearanceLarge" />

</RelativeLayout>

Step 9 : Edit code of mainactivity.java file


package com.kpbird.chipsedittext;

import android.app.Activity;
import android.os.Bundle;
import android.util.Log;
import android.view.View;
import android.widget.ArrayAdapter;
import android.widget.MultiAutoCompleteTextView;
import android.widget.TextView;

public class MainActivity extends Activity {

ChipsMultiAutoCompleteTextview mu;

@Override
protected void onCreate(Bundle savedInstanceState) {
super.onCreate(savedInstanceState);
setContentView(R.layout.activity_main);

mu = (ChipsMultiAutoCompleteTextview) findViewById(R.id.multiAutoCompleteTextView1);

String[] item = getResources().getStringArray(R.array.country);

Log.i("", "Country Count : " + item.length);
mu.setAdapter(new ArrayAdapter(this,
android.R.layout.simple_dropdown_item_1line, item));
mu.setTokenizer(new MultiAutoCompleteTextView.CommaTokenizer());
}

public void buttonClicked(View v) {
TextView tv = (TextView) findViewById(R.id.textView1);
tv.setText(mu.getText().toString());
}

}


Source code : Github Link
    

Android API document linked with the source code

$
0
0
Hello guys,

I found interesting things today, While reading Android API document,  I found (View Source) link beside class name. Now It is very easy to quick look of class/source code from API document.

Let's check source code of Activity class.

Step 1: Open following link in your browser
http://developer.android.com/reference/android/app/Activity.html


Step 2: Click on View Source link beside Activity

If you don't see View Source link then install "Android SDK Reference Search" Chrome Extension

Step 1: Open following link
https://chrome.google.com/webstore/detail/android-sdk-reference-sea/hgcbffeicehlpmgmnhnkjbjoldkfhoin


Step 2: Click "Add to chrome", after installation open following link to verify extension
chrome://extensions/


Viewing all 75 articles
Browse latest View live